Cat's Guide to C++ | SFML | Set Up | Visual Studio 2019 | Level 0
This tutorial will focus on working with SFML (Simple and Fast Multimedia Library) in Visual Studio 2019.
Note: While there is Visual Studio for Mac, I tried this tutorial only with Windows version of Visual Studio.
Contents:
1. Download Visual Studio 2019
2. Download SFML
3. Create a C++ Console App Template with Visual Studio 2019
4. Link SFML to the Console App Project
4 - A) Add an Additional Include Directory
4 - B) Add an Additional Library Directory
4 - C) Add Additional Dependencies
4 - D) Create a SFML Project Template
4 - E) Add SFML .dll Files
5. Try Using SFML to Open a Window
1. Download Visual Studio 2019
The first step in working with SFML in Visual Studio 2019 is downloading Visual Studio 2019, which is an IDE (Integrated Development Environment). To download this IDE, visit this web page: https://visualstudio.microsoft.com/downloads/
If you are a student, open-source contributor, or an individual, you can download Visual Studio Community 2019 for free at the web page.
Once you run the file downloaded from the page, it will start downloading and installing the Visual Studio Installer.
After a successful installation of Visual Studio Installer, the Installer will take you to the 'Workloads' menu. In 'Workloads,' select 'Desktop development with C++' and click 'Install.' This installation may take several minutes.
If you see 'Visual Studio Community 2019' in the 'Installed' menu of your Visual Studio Installer, congratulations! Now your computer is equipped with Visual Studio Community 2019.
2. Download SFML
Let's move on to our next task, downloading SFML. You can download SFML at this link: https://www.sfml-dev.org/download.php. Click on a button that says 'SFML 2.5.1.'
'SFML 2.5.1' button will take you to the 'Download SFML 2.5.1' page. You can download either the 32-bit version or 64-bit version of SFML on this page.
* Note that a program built with the 32-bit version can compile and run on a 32-bit or 64-bit Windows. However, a program built with the 64-bit version can compile and run only on a 64-bit Windows. Downloading the 32-bit version of SFML is recommended if you want your program to work on both 32-bit and 64-bit Windows.
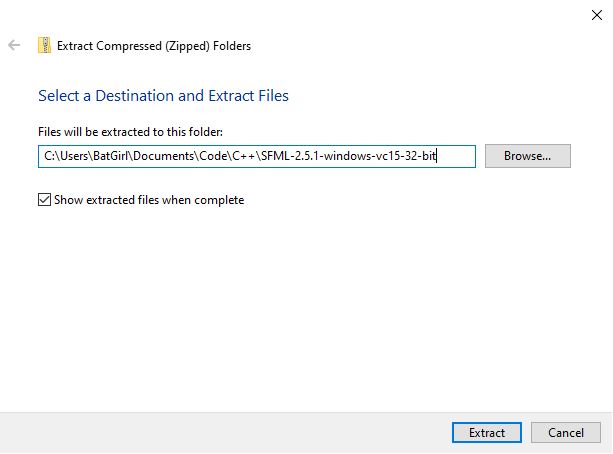
Download the latest version: Visual C++ 15 (2017)
3. Create a C++ Console App Template with Visual Studio 2019
Once you have installed Visual Studio 2019 and downloaded SFML, it's time to create a C++ project. Go to your Visual Studio and select 'Create a new project' under 'Get Started.'
Selecting 'Create a new project' will prompt you to choose a project template. Click on 'Console App' template with a 'C++' tag, and then click 'Next.'
The 'Next' button will take you to the 'Configure your new project' page.
On this page, name your project 'SFMLStarter' under 'Project name,' and select the location you want to create your new C++ project under 'Location.' Check the box for 'Place solution and project in the same directory.'
Click the 'Create' button to create the C++ project.
The project you just created should look like this:
The file named SFMLStarter.cpp is where you can write in C++. The '.cpp' file ending indicates that the file is written in C++.
If you do not see SFMLStarter.cpp, check your Solution Explorer. Below is a screenshot of my Solution Explorer with SFMLStarter.cpp highlighted in blue.
4. Link SFML to the Console App Project
To use SFML in the project you just created, the project will need access to SFML. You can give this access to your project by going to 'Project > SFMLStarter Properties'.
4 - A) Add an Additional Include Directory
Clicking on the 'SFMLStarter Properties' button will toggle on a 'SFMLStarter Property Pages' window. In this window, select 'General' under 'Configuration Properties > C/C++' in the menu to the left. After selecting 'General', find 'Additional Include Directories' in the menu to the right.
At 'Additional Include Directories' property, click on the arrow and select '<Edit...>.'
The '<Edit...>' option will bring up 'Additional include Directories' window. In this window click on the 'New Line (Ctrl-Insert)' button. Include directories are pre-written C++ scripts you can use for your projects.
This button will create a new line. Click on the three dots (...) in this line to assign a folder containing SFML. Doing so will bring up a file browser where you can find the folder you would like to add as an additional include directory.
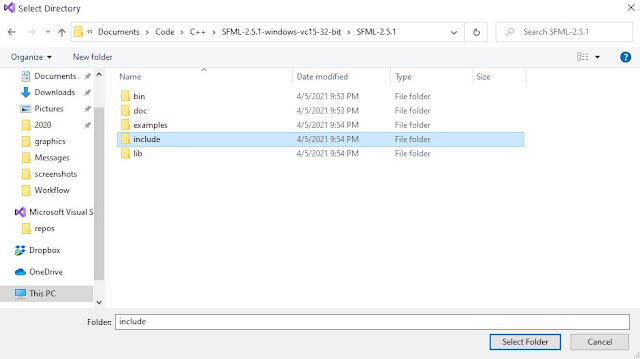
The folder with the SFML is called 'include,' and it should be inside the folder you unzipped earlier. In the file browser. choose the 'include' folder and click the 'Select Folder' button.
The path to the selected folder will appear in the 'Additional Include Directories' window. Click 'OK' to confirm.
The path will also show in the 'Additional Include Directories' property.
Your project can now find and utilize the content of the 'include' folder.
4 - B) Add an Additional Library Directory
There is another folder your project needs access to use SFML, and it is the 'lib' folder. Like 'include,' you can find the 'lib' folder inside the unzipped SFML file.
In the 'SFMLStarter Property Pages' window, select 'General' under 'Configuration Properties > Linker.'
Under 'General,' find the 'Additional Library Directories' property, and add the path to the 'lib' folder the same way you added the 'include' folder.
Once you add the path to the 'lib' folder, the path will show in the 'Additional Library Directories' property.
4 - C) Add Additional Dependencies
Your next step is to go to 'Configuration Properties > Linker > Input' in the 'SFMLStarter Property Pages' window. Under 'Input', find 'Additional Dependencies' property and edit it.
Editing the 'Additional Dependencies' property will bring up an 'Additional Dependencies' window. There is a text box in this window. In this text box, copy and paste 'sfml-graphics-d.lib;sfml-window-d.lib;sfml-system-d.lib;sfml-network-d.lib;sfml-audio-d.lib;'
SFML is composed of five modules: System, Window, Graphics, Audio, and Network. Each module has a corresponding library that should be linked as additional dependencies.
Library for Each Module
System: sfml-system-d.lib
Window: sfml-window-d.lib
Graphics: sfml-graphics-d.lib
Audio: sfml-audio-d.lib
Network: sfml-network-d.lib
4 - D) Create a SFML Project Template
You can make a template to save the properties (Additional Include Directories, Additional Library Directories, and Additional Dependencies) you changed for future projects. Select 'Project > Export Template...' to export your project properties as a project template.
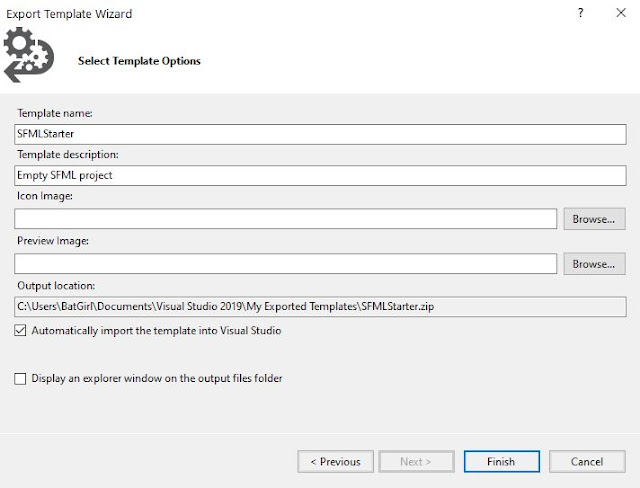
Clicking on the 'Export Template...' button will bring up an 'Export Template Wizard' window. In 'Export Template Wizard,' select 'Project template' under 'Which type of template would you like to create?', select 'SFMLStarter' under 'From which project would you like to create a template?,' and click 'Next >.'
In the second page of 'Export Template Wizard,' name your Template under 'Template name:' and describe it under 'Template description:.' I named my template 'SFMLStarter,' and wrote 'Empty SFML project' as its description. After naming and describing your template, click 'Finish.'
Now, when you create a new SFML project in Visual Studio 2019, you can choose the template you exported.
4 - E) Add SFML .dll Files
The last step before using SFML is copying SFML '.dll' files and pasting them inside the Visual Studio project folder.
SFML '.dll' files live inside the 'bin' folder in the unzipped SFML folder. Open the 'bin' folder.
Go to your 'SFMLStarter' Visual Studio 2019 project folder.
Open the folder.
Paste the '.dll' files inside the folder.
You are now ready to begin using SFML in your Visual Studio 2019 project!
5. Try Using SFML to Open a Window
Erase everything in your SFMLStarter.cpp and paste the code below into the file.
If you have never worked with C++ before, reading this article on Output and Input in C++ may be helpful in understanding the code.
All you really need to know is that this code opens a 800px by 800px window, and enables you to close the window with the close button.
#include <SFML/Graphics.hpp>
int main() {
sf::Window window(sf::VideoMode(800, 800), "SFML");
while (window.isOpen()) {
sf::Event event;
while (window.pollEvent(event)) {
if (event.type == sf::Event::Closed)
window.close();
}
}
return 0;
}
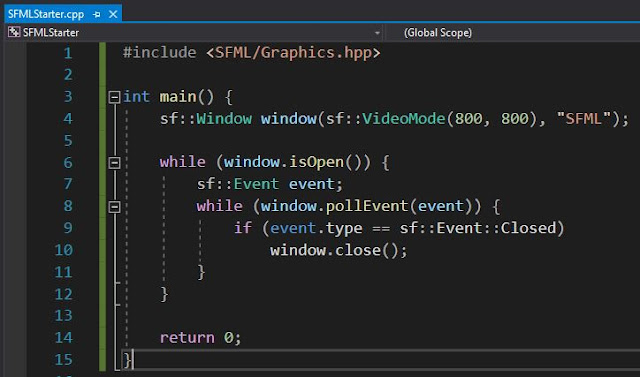
Your SFMLStarter.cpp file should now look something like the screenshot below:
Try the 'Local Windows Debugger' to run the code.
You should see a 800px by 800px window with nothing in it. You can click on the close button to close the window.
Fonts: Sawarabi Mincho, Playfair Display, Source Code Pro


Comments
Post a Comment