Cat's Guide to C++ | SFML | Sprite Animation | Visual Studio 2019 | Level 3
This tutorial will focus on creating an animation with a sprite sheet. A 500px by 500px window will display the animation in the middle of the screen.

Note - 1: This tutorial does not cover how to set up Visual Studio 2019 for SFML. If you do not know how to use SFML with Visual Studio, this tutorial of mine (Cat's Guide to C++ | SFML | Setup | Visual Studio 2019 | Level 0) walks through what you need to know.
Note - 2: This tutorial assumes that you know the basics of C++. If you are not familiar with C++, this tutorial of mine (Cat's Guide to C++ | Output and Input in C++ | Visual Studio Code | Level 0) goes over the fundamentals.
CONTENTS
1. Creating a New Project
2. Adding a Sprite Sheet
3. Opening and Closing the Window
4. Displaying a Sprite
5. Displaying an Animation
1. Creating a New Project
A. Open up your Visual Studio 2019, and click on Create a new project button.
B. The button will take you to a list of project templates.
In project templates, Select the Console App template or a custom template for your SFML projects, if you have one.
C. Once you select a template, You will see the Configure your new project page.
In Configure your new project,
1. Name your project SpriteAnimation
2. Choose where you would like to save your project under Location
3. Click the checkbox for Place solution and project in the same directory.
4. Click the Create button
Note: Remember to link your Visual Studio 2019 project with SFML

2. Adding a Sprite Sheet
A. Download the sprite sheet for this project.
B. Create a folder named graphics inside your Visual Studio 2019 Project Folder.

C. Add the sprite sheet in the graphics folder.
3. Opening and Closing the Window
A. In your Visual Studio 2019's Solution Explorer, find your c++ source file with a file extension .cpp.

B. Erase everything in your source file, and write #include <SFML/Graphics.hpp> in the first line of the file. You need this line to use SFML's graphics module.
C. After the first line, write:
int main() {
main() is the starting point for c++ applications. If main() returns 0, it means the application was successfully executed.
D. Inside main(), before return 0, write:
sf::VideoMode vm(500, 500);
sf::RenderWindow window(vm, "Sprite Animation");
These two lines of code create a 500px by 500px fullscreen window titled Sprite Animation.
E. Under the code for creating the window, write:
while (window.isOpen()) {
sf::Event event;
while (window.pollEvent(event)) {
if (event.type == sf::Event::Closed) {
window.close();
}
}
}
This group of code will check if there is a request for closing the window while the window is open (while(window.isOpen())). You can close the window (window.close()) with a close button in the window.

4. Displaying a Sprite
A. Create a texture and check if the image file for the texture is found.
1. After creating the window, write the code below to create a texture to store the sprite sheet:
sf::Texture animTexture;
2. You need to load the sprite sheet into the texture, and check if the sprite sheet was found. Write the code below to do so. If the sprite sheet for the texture is not found, this code will print a message to the console saying 'eye-sheet-x8 missing in graphics folder' and return -1. When the main() function returns -1, it means there was an error in the program execution.
if (!animTexture.loadFromFile("graphics/eye-sheet-x8.png")) {
std::cout << "eye-sheet-x8 missing in graphics folder.";
return -1;
}
Note: make sure to write the correct path to the sprite sheet for animTexture.loadFromFile().
3. You should have an error from the last group of code, for using std::cout.
Take a look at the screenshot below with cout underlined in red

std::cout is a part of the iostream library. To use std::cout to print to the console, you need to put #include <iostream> after the first include directive.

4. Define the sprite size as a vector with two coordinates using sf::Vector2. The first coordinate (x) is for sprite width, and the second coordinate (y) is for sprite height.
After loading the sprite sheet into animTexture, write:
sf::Vector2i spriteSize(152, 72);
The code says spriteSize(152, 72) because each sprite in the sprite sheet is 152px wide and 72px tall. You will use spriteSize to extract the sprites from the sprite sheet.

5. Define an array of sf::Sprite to store the sprites in the sprite sheet. Under the definition for spriteSize, write:
std::vector<sf::Sprite> animSprites;
![]()
6. Define and initialize integer type variables sheetRow and sheetColumn to store the number of rows and columns in the sprite sheet. You need these numbers for when you extract the sprites from the sprite sheet. After the last line of code, write:
int sheetColumn = animTexture.getSize().x / spriteSize.x;
int sheetRow = animTexture.getSize().y / spriteSize.y;
animTexture.getSize().x is the width of the sprite sheet. If you divide this width by spriteSize.x, which is the width of each sprite, you get the number of columns in the sprite sheet.
animTexture.getSize().y is the height of the sprite sheet. If you divide this height by spriteSize.y, which is the height of each sprite, you get the number of rows in the sprite sheet.

7. After initializing sheetRow and sheetColumn, add sprites in animSprites.
A. Add sprites from upper left hand corner. These sprites from an eye opening animation. Write:
for (int i = 0; i < sheetRow; i++) {
for (int j = 0; j < sheetColumn; j++) {
animSprites.push_back(sf::Sprite(animTexture, sf::IntRect(spriteSize.x * j, spriteSize.y * i, spriteSize.x, spriteSize.y)));
}
}
This code uses IntRect() to select the sprite in the sprite sheet to extract. It has four parameters. The first two parameters are for the coordinates for the upper left hand corner of the sprite. The last two parameters are for the width and the height of the sprite. Note that IntRect() only takes integer parameters.
This code will start extracting sprites from (0,0), which is where (spriteSize.x * j, spriteSize.y * i) is when i = 0 and j = 0. The code will extract all sprites in the first row (i = 0), left to right, then extract all sprites in the second row (i = 1), left to right. A new sprite is added to the back of the array with push_back().
B. Add sprites from lower right hand corner. These sprites form an eye closing animation. After the group of code above, write:
for (int i = sheetRow - 1; i >= 0; i--) {
for (int j = sheetColumn - 1; j >= 0; j--) {
animSprites.push_back(sf::Sprite(animTexture, sf::IntRect(spriteSize.x * j, spriteSize.y * i, spriteSize.x, spriteSize.y)));
}
}
This code does what the code in 4-7-A does in reverse. The code will extract all sprites in the second row, right to left, then extract all sprites in the first row, right to left.
C. Position all sprites to the center of the window. After adding sprites into animSprites, Write:
for (int i = 0; i < animSprites.size(); i++) {
sf::FloatRect animSpriteRect = animSprites[i].getLocalBounds();
animSprites[i].setOrigin(animSpriteRect.width / 2.0f, animSpriteRect.height / 2.0f);
animSprites[i].setPosition(window.getSize().x / 2.0f, window.getSize().y / 2.0f);
}
This code iterates through the animSprites array with a for loop. When the for loop iterates, it sets the origin of each sprite to the center of the sprite. It also positions the sprite to the center of the window.
1. Create variables for the animation. After the code blocks from section 4, write:
int frameIndex = 0;
float frameDuration = 0.1f; // Each frame takes about 1/10 sec.
sf::Clock clock;
frameIndex is for keeping track of the current frame when the animation runs.
frameDuration is for setting the length of each frame in the animation. The plan here is to move on to the next frame after about frameDuration seconds. With frameDuration being 0.1, each frame will show for about 1/10 sec.
clock is for measuring time.

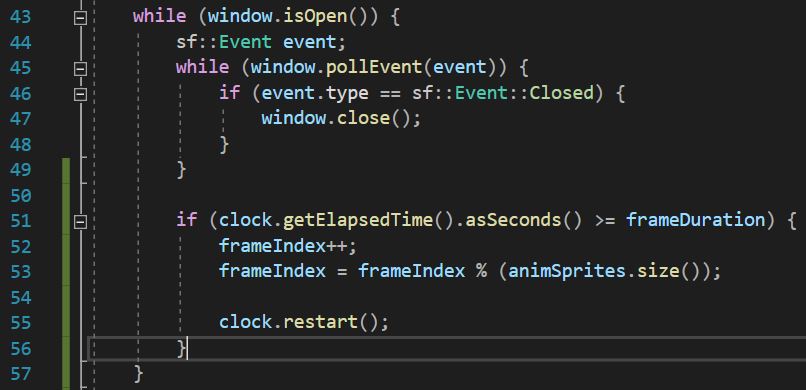
2. Change frames. The next step is to iterate through the animSprites array and play the animation. inside while (window.isOpen()) {...}, after while (window.pollEvent(event)) {...}, write:
if (clock.getElapsedTime().asSeconds() >= frameDuration) {
frameIndex++;
frameIndex = frameIndex % (animSprites.size());
clock.restart();
}
This code increases frameIndex by 1 if it has been frameDuration sec or more. Afterwards, it calculates the remainder of frameIndex divided by the number of sprites in animSprites. The remainder is than set as frameIndex, meaning every time the animation ends, it loops back to the beginning.
3. Display the window. After the code block from section 5-2, write:
window.clear(sf::Color(0, 0, 0));
window.draw(animSprites[frameIndex]);
window.display();
This code clears the window and sets the background color to black. Than it draws a sprite in animSprites at frameIndex. Lastly, it displays the window.

If you run the program now, it should open up a window with an animation like this:


Comments
Post a Comment